How to Draw a Realistic Human Heart for Beginners
If you’re feeling nervous about starting a heart drawing, don’t worry—you can do it! Many tutorials make creating a realistic human heart drawing simple by breaking it down into easy steps.
Begin your heart drawing with basic shapes, such as outlining the ventricles in a shape similar to Africa.
Gradually add more detail to your heart drawing by sketching the aortic arch, arteries, and veins one at a time.
As your heart drawing progresses, erase any guide lines and use curved lines to define the veins and arteries.
Complete your heart drawing by adding color for a realistic, lifelike effect.
Key Takeaways
Begin your heart drawing with easy shapes. Add details slowly for better results.
Use different pencils and strong paper. Draw light lines, dark shadows, and small details.
Look at real heart pictures to help you draw. Check the size and shape as you go.
Shade and color your heart little by little. This helps it look real and 3D.
Draw often, take your time, and learn from errors. This will help you get better at drawing.
Materials for Heart Drawing
Essential Drawing Tools
Before you start drawing a realistic human heart, you need the right tools. Good materials make your drawing process smoother and help you get better results. Here’s a simple list to get you started:
Drawing Pencils:
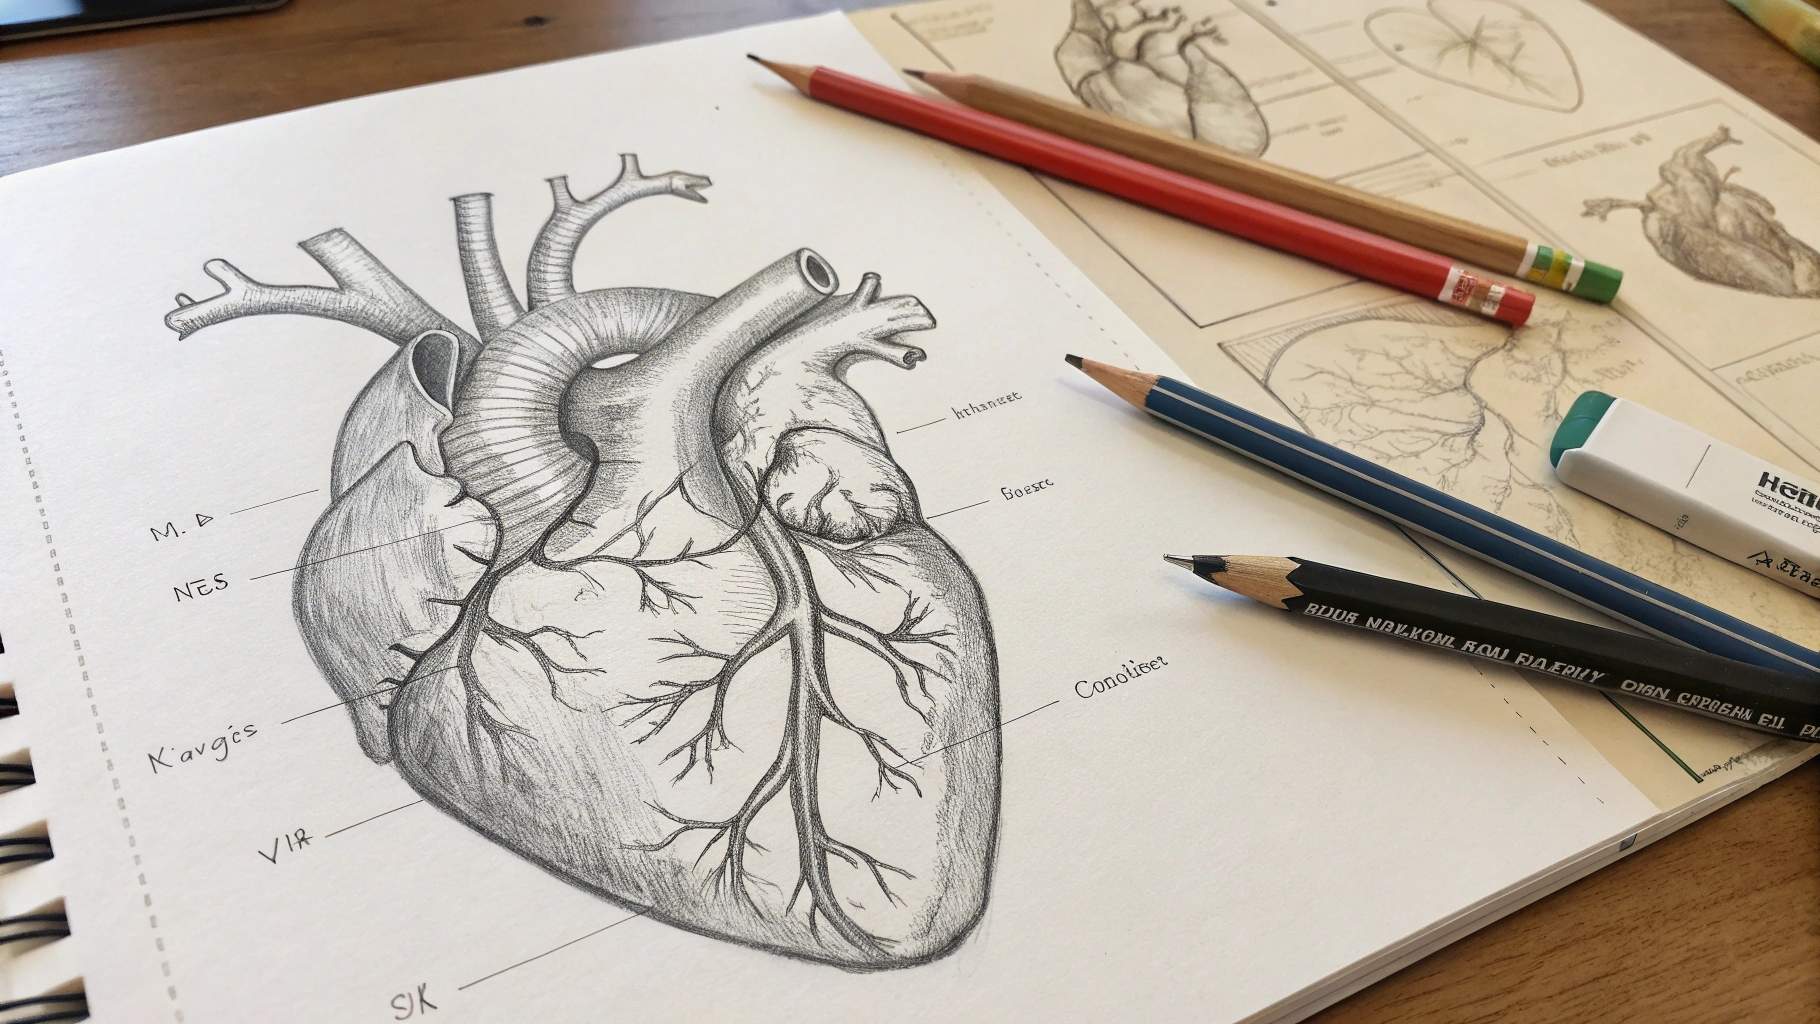
You want a range of pencils for different steps. Start with a 2H charcoal pencil to sketch the main shapes like the ventricles, aorta, and atria. This pencil makes light lines that are easy to erase. Next, use a 6B charcoal pencil to darken the outlines and add shadows. This helps you show depth and curves. For the final touches, grab an 8B charcoal pencil. This one is perfect for making veins and certain areas stand out with strong contrast and detail.Eraser:
A soft eraser lets you fix mistakes and clean up your sketch lines.Sharpener:
Keep your pencils sharp for neat lines and details.
Tip: Using different pencils for each step helps you control the look of your drawing. You can make soft lines, deep shadows, and sharp details just by switching pencils.
Recommended Supplies for Shading and Color
If you want your heart drawing to look even more realistic, you’ll need some extra supplies for shading and color. Here’s what artists recommend:
Colored Pencils:
Choose high-quality brands like Prismacolor, Polychromos, or Luminance. These pencils blend smoothly and let you layer colors for a lifelike effect.Drawing Paper:
Pick sturdy paper such as Bristol Vellum or Canson Colorline. These papers hold color well and help your shading look smooth.Blending Tools:
Try a colorless blender pencil or a bit of Gamsol to blend your colors. This makes your drawing look soft and natural.Fixative Spray:
Use a fixative like Sennelier or Grumbacher to protect your finished drawing. It keeps your colors bright and your shading sharp.Reference Images:
Find clear photos of real hearts. Good references help you match colors and shapes more accurately.
Remember, shading brings your drawing to life. Layer your pencil strokes and practice often. The right tools and a little patience make a big difference!
How to Draw a Human Heart: Step-by-Step Guide
Sketching the Basic Outline
Let’s start your heart drawing tutorial with the basic outline. You don’t need to worry about details yet. Just focus on the main shapes. This step helps you build a strong foundation for your drawing.
Begin by sketching a tilted, irregular curved shape. It should look a bit like the bottom half of an acorn or a lopsided apple. Angle it about 120 degrees to the left. This shape forms the main body of the heart.
Add a rounded bump on the top left side. This bump will become the right atrium. Remember, in most heart diagrams, the right side of the heart appears on the left side of your drawing.
Draw a large tube extending from the top of the bump. This tube is the superior vena cava. If you want, you can add two smaller branches at the top for the right and left brachiocephalic veins.
Next, sketch a wider, upside-down U-shaped tube to the right of the right atrium. This is the aorta. For extra detail, add three smaller tubes at the top of the aorta.
Add a third large tube, the pulmonary artery. It wraps behind the aorta on the left and in front on the right.
Tip: Use light pencil strokes for this outline. You’ll erase and refine these lines as you go.
A step-by-step approach like this helps you keep your drawing organized. It’s just like following a map. Each step builds on the last, making it easier to get the anatomy right.
Drawing the Main Heart Shape
Now you can start shaping the heart’s main body. This part of the drawing tutorial brings your sketch to life. You’ll see the heart take form as you add curves and connections.
Use your outline as a guide. Smooth out the edges of the acorn shape so it looks more natural and less like a cartoon.
Connect the tubes you drew earlier to the main body. Make sure the aorta and pulmonary artery look like they flow out of the heart.
Add small curved lines to show the gaps between the heart’s segments. These lines help separate the aorta, pulmonary artery, and main body.
Refine the shape of the right atrium bump. It should blend smoothly into the main heart shape.
Here’s a quick comparison to show why a step-by-step method works so well for anatomical accuracy:
Step in Drawing Tutorial |
What You Do |
Why It Helps |
|---|---|---|
Sketch Outline |
Draw basic shapes and tubes |
Keeps proportions correct |
Refine Main Shape |
Smooth edges, connect parts |
Adds realism and flow |
Add Details |
Show gaps, blend chambers |
Improves anatomical accuracy |
This table shows how each step in the heart drawing tutorial builds on the last. You get better results when you follow a clear sequence.
Adding Atria and Ventricles
You’re ready to add the atria and ventricles. These are the heart’s main chambers. Getting them right makes your heart drawing look realistic.
Draw the right atrium by enclosing an irregular form at the junction of the ventricle and aortic arch. It should look like a small, rounded bump.
Add the superior vena cava as a narrow vertical oval. Connect it to the right atrium with a curved line.
Sketch the left coronary artery. It crosses the ventricle with branching curved lines that look like a tree.
Draw the major arteries extending from the aortic arch. Use parallel curved lines and branch them with a “V” shape.
Add the left atrium and pulmonary veins. Use irregular shapes and pairs of parallel curved lines connected at the ends.
Refine the heart’s details. Use short lines to show texture and veins.
You can check your work against anatomical diagrams and research materials. These resources show the correct placement of the atria and ventricles. They also help you understand how the chambers connect and where the blood flows. Many drawing tutorials use these diagrams to teach accuracy.
Note: If you want to make your heart drawing even more realistic, add shading to the ventricles and atria. Use darker shadows along the edges and lighter areas where the light hits.
By following these step by step instructions, you’ll see your heart drawing come together. Each part of the tutorial builds your skills and helps you understand how to draw a human heart with confidence.
Drawing Arteries and Veins
Now that you have the main shape and chambers, it’s time to add the arteries and veins. These vessels make your heart drawing look real and full of life. You want to show how blood moves in and out of the heart. This step can seem tricky, but you can break it down into simple parts.
Start with the aorta. This is the largest artery. It comes out of the top of the heart and curves like a candy cane. Draw it thick and strong. The aorta branches into three main tubes: the brachiocephalic trunk, the left common carotid artery, and the left subclavian artery. You can sketch these as smaller tubes coming off the arch.
Next, add the pulmonary artery. This vessel sits near the aorta but goes off to the side. It splits into two branches, one for each lung. Make sure the pulmonary artery looks a bit thinner than the aorta.
Draw the superior vena cava and inferior vena cava. These veins bring blood back to the heart. The superior vena cava comes down from above, while the inferior vena cava comes up from below. Both connect to the right atrium.
Add the coronary arteries and cardiac veins. These wrap around the heart’s surface like tree roots. Use wavy lines to show how they twist and turn. The left anterior descending artery and circumflex artery are important branches to include.
Tip: Use reference images from trusted anatomy sites like Kenhub. Their expert illustrations show exactly where each artery and vein goes. You can see how the vessels branch and curve, which helps you draw them in the right place.
Here’s a quick list of what to include for a realistic heart drawing:
Aorta (with its three main branches)
Pulmonary artery (with two branches)
Superior and inferior vena cava
Coronary arteries and cardiac veins
You don’t have to draw every tiny vessel. Focus on the main ones first. If you want more detail, you can add smaller branches later. Many drawing tutorial guides suggest starting simple and building up as you go.
Refining Details and Contours
You’ve got the main parts down. Now, let’s make your heart drawing stand out by refining the details and contours. This is where your heart starts to look lifelike.
Begin by looking at the edges of your heart. Smooth out any rough lines. Use your pencil to add gentle curves where the heart bulges or dips. Don’t be afraid to erase and redraw until it feels right.
Add texture to the surface. The heart isn’t flat. It has grooves and ridges where the vessels run. Lightly shade these areas to show depth. Use short, curved strokes to follow the shape of the heart. This makes the drawing look three-dimensional.
You can also use a technique inspired by the POLYCORE method. This method comes from medical imaging, where experts use polygons to outline and refine the shape of blood vessels. Try breaking the heart’s outline into small, straight segments. Then, connect them with smooth curves. This helps you get accurate contours and fix any odd shapes.
Here’s a simple table to help you remember what to check as you refine your drawing:
Step |
What to Do |
Why It Helps |
|---|---|---|
Smooth Edges |
Erase rough lines, redraw curves |
Makes the heart look real |
Add Texture |
Shade grooves and ridges |
Shows depth and detail |
Refine Contours |
Use small segments, connect curves |
Improves accuracy |
Remember: Take your time with this step. The more you look at reference images and adjust your lines, the better your heart drawing will look. Every drawing tutorial recommends patience and practice here.
When you finish refining, step back and look at your work. You might spot areas that need a little more shading or a smoother line. Keep tweaking until you feel proud of your heart drawing tutorial result.
Tips for Realistic Heart Drawing
Using Reference Images
You might feel stuck when you try to draw a human heart from memory. That’s normal! Using reference images can help you see all the shapes and details you need. You can find great diagrams online. For example, the Wikipedia file 'Heart diagram-en.svg' is a top-quality image. It’s clear, accurate, and even has labels to help you spot each part. Another helpful place is the IMAIOS website. There, you can look at 3D models, medical illustrations, and real photos of hearts. These resources show you exactly how the heart looks from different angles. When you use these images, you can check your work and fix any mistakes right away.
Tip: Keep a reference image next to your drawing. Look back and forth as you sketch. This helps you catch small details you might miss.
Getting Proportions Right
Getting the size and shape of each part correct makes your heart drawing look real. Start by comparing the main sections. The ventricles should look bigger than the atria. The aorta and pulmonary artery need to be thick and strong, while the veins are thinner. Try this simple trick: use your pencil to measure one part, then compare it to another. If the aorta looks too small, make it bigger. If the atria seem too wide, adjust them. You can also lightly sketch guidelines to keep everything in place.
Here’s a quick table to help you remember the main proportions:
Part |
Size Compared to Others |
|---|---|
Ventricles |
Largest |
Atria |
Smaller, on top |
Aorta |
Thick, arches above heart |
Pulmonary Artery |
Slightly thinner than aorta |
Veins |
Thinner, connect to atria |
Avoiding Common Mistakes
Everyone makes mistakes when learning to draw. The good news is you can avoid the most common ones with a few simple tips:
Don’t rush. Take your time with each step.
Avoid making the heart too round or too flat. Real hearts have a unique, uneven shape.
Don’t forget the vessels. The heart needs arteries and veins to look complete.
Watch out for smudging. Keep a piece of scrap paper under your hand as you draw.
Remember: Practice helps you spot and fix mistakes faster. Each time you draw, you’ll get better at seeing what looks right.
Shading and Coloring Your Heart Drawing
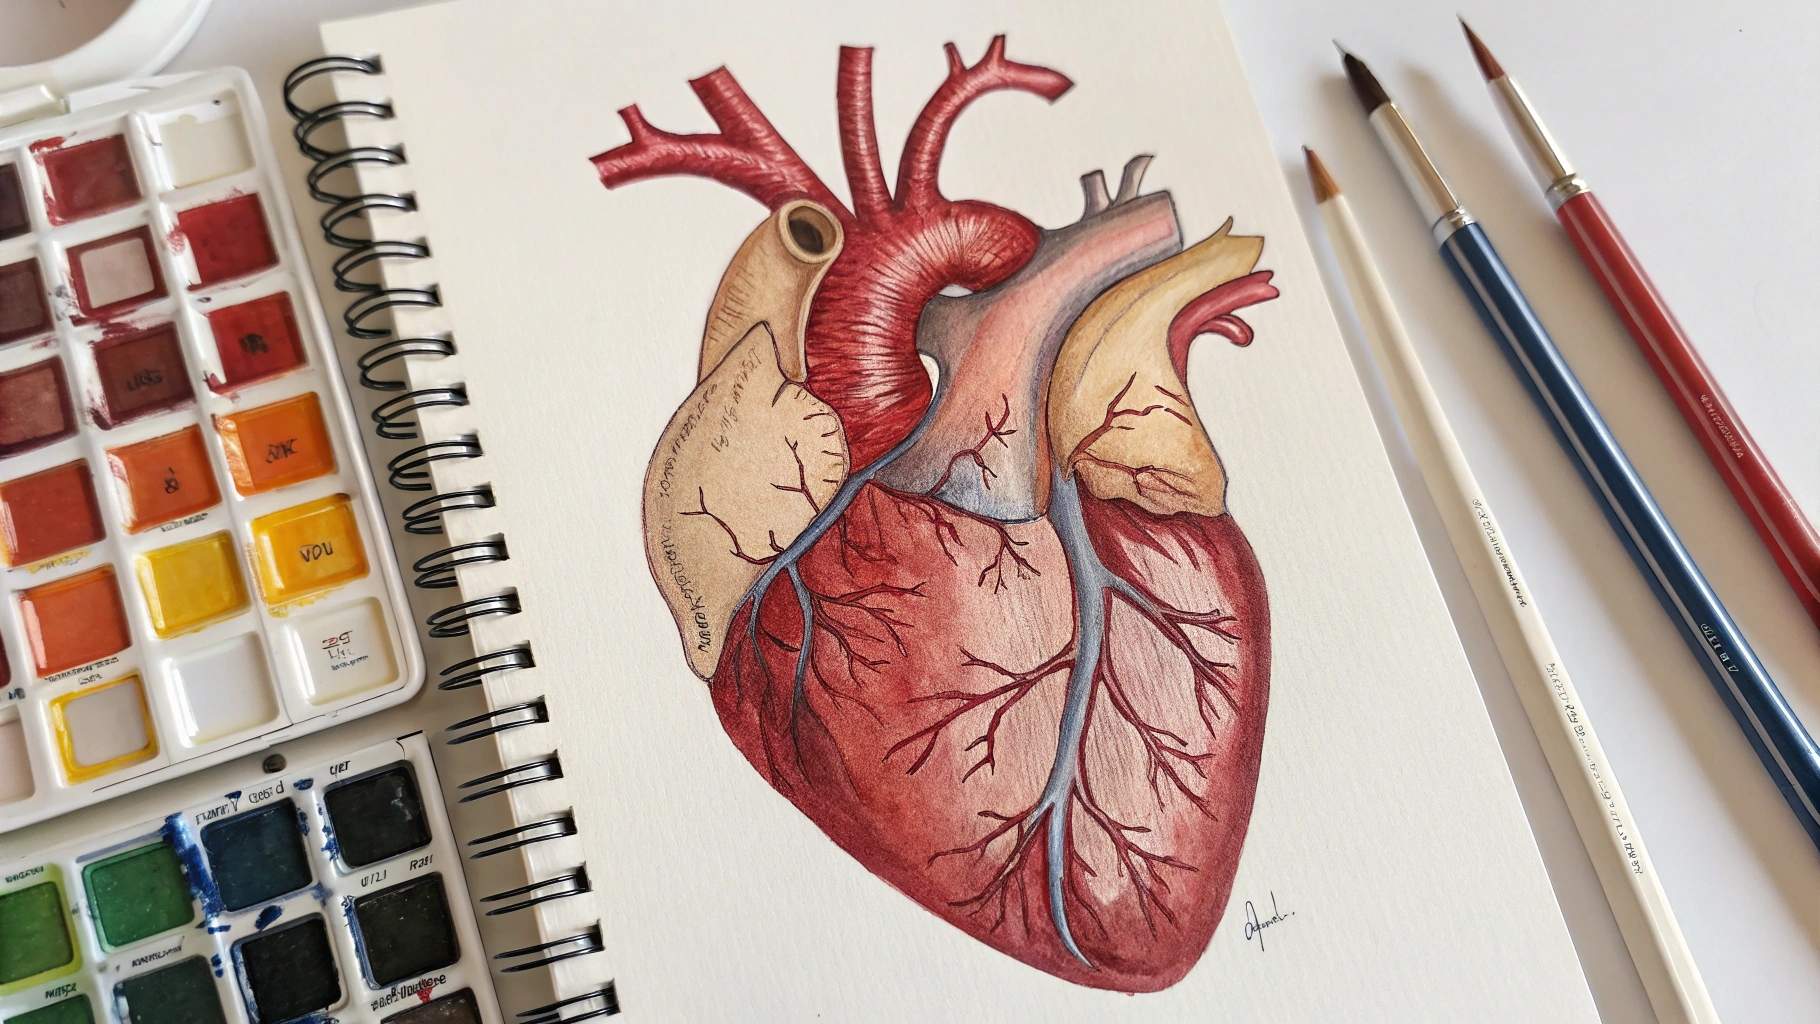
Simple Shading Techniques
Shading brings your heart drawing to life. You can use simple methods to make your sketch look three-dimensional. Start with a light pencil outline. This helps you see the shapes and where the shadows will go. Try these easy shading techniques:
Hatching: Draw straight lines close together to create shadow.
Cross-hatching: Add another set of lines crossing the first set.
Stippling: Make tiny dots for a soft, textured look.
Contour hatching: Follow the curves of the heart with your lines.
Practice these on a scrap piece of paper first. When you shade the heart, look at your reference image. Notice where the light hits and where the shadows fall. Use a softer pencil for darker areas. Press lightly for lighter shadows. You can layer lines or dots to make the shading darker. This helps show the roundness of the ventricles and the shine on the arteries. Take your time and check your work often. If you need a break, step away and look again with fresh eyes.
Tip: Leave thin white strips on the heart to show shiny spots. This makes the heart look wet and real.
Adding Color for Realism
Color makes your heart drawing pop. Use colored pencils or paints to add depth. Start with the main colors—deep reds for the muscle, purples or blues for veins, and lighter pinks for highlights. Try layering colors to create shadows and highlights. For example, add a little blue to the red areas to make them look cooler and more natural. Use a white pencil or a bit of eraser to create bright spots where the light hits.
A few color tricks can help your drawing look even more realistic:
Place red next to green to make the red look brighter.
Mix warm and cool colors to show depth and temperature.
Layer transparent colors for a glowing effect.
Color Technique |
What It Does |
|---|---|
Layering |
Adds depth and richness |
Contrasting Colors |
Makes colors stand out |
Glazing |
Creates soft, glowing shadows |
Test your colors on a scrap paper before adding them to your drawing. Adjust as needed to get the look you want.
Optional: Labeling Parts and Indicating Blood Flow
If you want to turn your drawing into a study tool, you can label the parts of the heart. Use neat, small writing and arrows to point to the atria, ventricles, arteries, and veins. You can also use colored arrows to show how blood flows through the heart. Red arrows can show oxygen-rich blood, and blue arrows can show oxygen-poor blood. This makes your drawing both beautiful and educational.
Note: Labeling helps you remember the anatomy and makes your drawing useful for studying or sharing with friends.
Practice Heart Drawing with Paint by Numbers
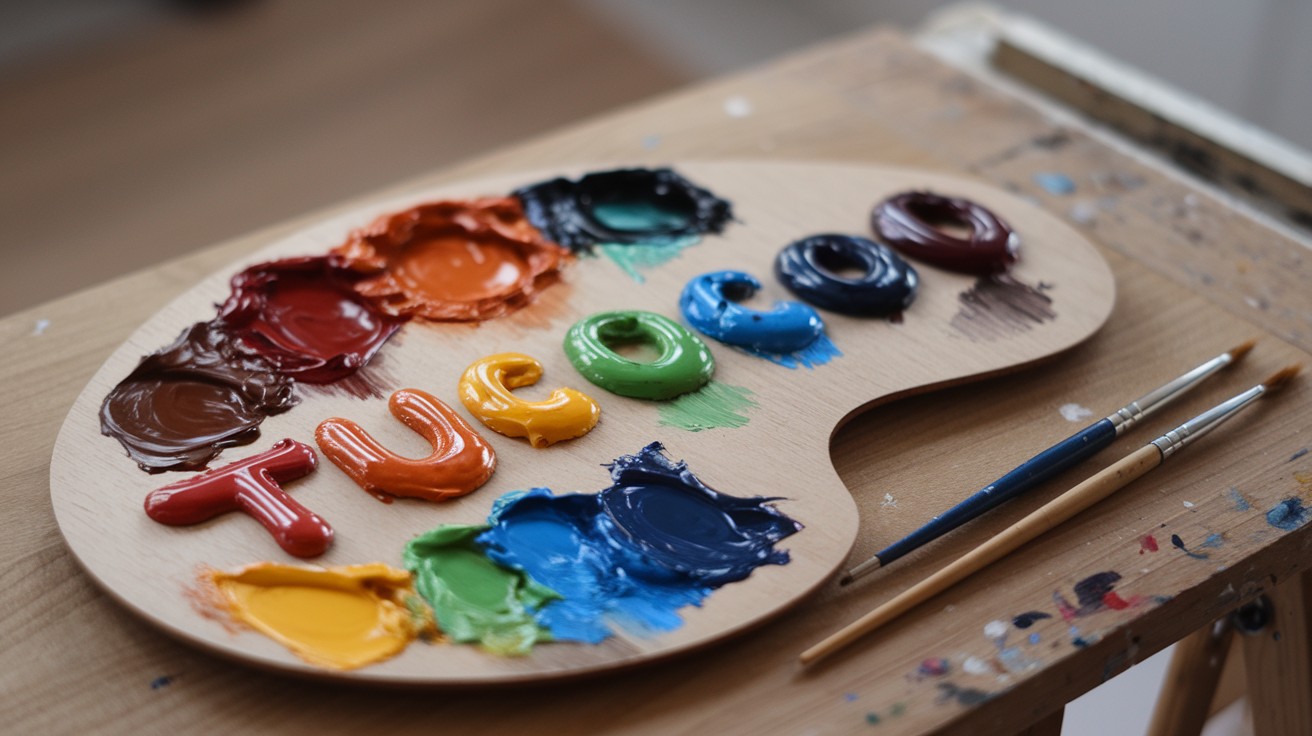
Tucocoo Paint by Numbers
Benefits of Paint by Numbers for Beginners
Paint by numbers kits make learning to draw and paint much easier, especially if you feel unsure about your skills. You get a clear guide, so you know exactly where to put each color. This method helps you build confidence and enjoy the process. Many artists and teachers recommend paint by numbers for beginners because it offers several important benefits.
Here’s a quick look at what you gain from using these kits:
Educational Benefit |
Explanation |
|---|---|
Motor Skills Development |
You improve your hand control by matching paint to numbered sections. This helps your fingers and hands get stronger and more precise. |
Creativity Enhancement |
You learn to see how colors and shapes come together. This skill helps you when you try freehand drawing later. |
Productivity and Patience |
You work step by step, which teaches you to stick with a project until it’s done. You feel proud when you finish. |
Historical Context |
Even Leonardo da Vinci used similar methods to teach painting, so you’re following in the footsteps of great artists. |
Emotional Benefits |
Painting helps you relax and feel good about yourself. It can lower stress and boost your mood. |
Screen-Free Engagement |
You get a break from screens, which helps your eyes and mind rest. |
Tip: Paint by numbers isn’t just for kids. Adults use these kits to relax, focus, and learn new skills, too!
Steps to Use a Paint by Numbers Heart Kit
You can start your heart drawing journey with a paint by numbers kit. These kits come with everything you need. Just follow these steps to get the best results:
Pick a kit with a heart design you like. Check that it includes paints, brushes, and a good canvas.
Smooth out the canvas with an iron if it has wrinkles.
Set up your workspace in a bright area so you can see the colors clearly.
Begin painting the smallest sections first. This helps you avoid smudging and makes shading easier.
Follow the color numbers and paint in order. Try to use a color gradient for smooth blending.
Cover the numbers completely, but don’t use too much paint. Thin layers look better.
Let each section dry for about 10-15 minutes before moving on.
Rinse your brush well between colors to keep them clean.
Close paint pots when you’re not using them so they don’t dry out.
Fix small mistakes with a toothpick or a little nail polish remover.
When you finish, seal your painting with a clear acrylic spray to protect it.
Frame your artwork and display it proudly!
Remember: Take your time and enjoy each step. The more you practice, the better your heart drawings will look!
You can draw a realistic human heart if you keep practicing. Mistakes will happen, but that’s how you learn and get better. Try new techniques and see what works for you. Remember to enjoy the process and celebrate your progress.
🎨 Keep your pencils moving, and your confidence will grow with every sketch!
Practice often
Experiment with different styles
Have fun with your art
FAQ
How long does it take to learn to draw a realistic heart?
Everyone learns at a different pace. You might see progress in just a few days if you practice often. Try to draw a little bit every day. You will get better with time and patience.
What if I make mistakes while drawing?
Mistakes are normal! You can erase lines or start over. Each mistake helps you learn. Artists make lots of changes before they finish a drawing. Keep going and have fun with the process.
Do I need expensive art supplies to start?
No, you do not need fancy tools. You can use regular pencils and paper. If you want to add color, try colored pencils or markers. The most important thing is to practice and enjoy drawing.
Can I use digital tools to draw a heart?
Yes, you can! Many artists use tablets or drawing apps. Digital tools let you undo mistakes and try new things. You can follow the same steps as with pencil and paper.